Showing posts with label how to. Show all posts

Wednesday, 7 February 2018

Medieval Town - video courses

Recently I finished preparing a Skillshare course about designing fantasyarchitecture. I presented there many architectonic details drawn from imagination, talked about the rules accompanying medieval builders and highlighted many frequently made mistakes in designing fantasy architecture. An important part of the course are “case studies” - four detailed illustrations summarizing four chapters of the course.

I explained there a designing process based, among others, on historical and constructional aspects. In this blog post, I’ll shortly present how they were drawn step by step. Today it’s time for a little, medieval town square.    


1.      If you don’t know, what is presented here, I don’t blame you. Luckily for me, shortly after that (i.e. before I forgot what I was thinking about) I began to draw a full-size, neat sketch.


2.      If you don’t know what to draw, just start with a horizon line placed in 1/3 or 2/3 of the height of the frame. Drawing vertical lines in 1/3 and2/3 of the width of the frame should be also helpful in setting the composition. I added also a few other divisions. Easy stuff so far 馃槉


3.      Probably now you can see, that there will be two fragments of buildings on the foreground (on the right and the left) and some houses with a bridge/gate in the background. Medieval towns quite often had irregularly shaped roads and “squares”. That’s why there are two different vanishing points for these two foreground buildings, as they are not meant to be parallel. It’s also time to decide how high the floors should be.


4.      Defining actual shapes of the buildings. Do you see the striking similarities with the first concept sketch?


5.      Marking the most important details, which should give some character to the scene.


6.      Further delving into the details…


7.      Erasing pencil lines and leaving only the fine, ink drawing.


8.      Seems like a big step forward in comparison with the previous one, but this part in fact required relatively little thinking and lots of arduous work. The one important aspect here was a decision about the light direction.


The next post will be dedicated to the third “case study” from the course - “Swamp Fortress” (I hope that the title is a bit intriguing).

In the meantime, you can take a look at how this medieval town square was colored with watercolors in sepia tones!

Monday, 5 August 2013

How To - "An Unpublished Illustration"


“The place where you made your stand never mattered. Only that you were there...and still on your feet.”
Stephen King, "The Stand"


Today I'm goin to  show a method of painting called  "from entirety to particularity". This artwork illustrates a story about the Thirty Years War. It was meant to be published in a cultural magazine... if the magazine would have been published. Unfortunately few days before releasing it, the publication got suspended . It's quite a pity because the story was just excellent!

Dzi艣 poka偶臋 metod臋 malowania "od og贸艂u do szczeg贸艂u". Poni偶sza praca mia艂a ilustrowa膰 opowiadanie dotycz膮ce wojny trzydziestoletniej, kt贸re ukaza艂oby si臋 w czasopi艣mie kulturalnym... gdyby owo czasopismo si臋 ukaza艂o. Niestety kilka dni przed terminem wydania zawieszono publikacj臋 na czas nieokre艣lony. Jest czego 偶a艂owa膰, bo opowiadanie by艂o 艣wietne!


1. A delicate application of colors and first layer of textures. A broad brush, plenty of water, a lot of paint, lots of salt and.. a little time.

1. Delikatna sygnalizacja docelowej kolorystyki i pierwsza warstwa tekstur. Szeroki p臋dzel, du偶o wody, sporo farby, mn贸stwo soli i... ma艂o czasu.

2. When the first layer dries up it's time for another one. Now with a thinner brush we should block colors , simulate a distance and continue defining textures of different materials (plants, ground, water etc.). Usually at this stage the drawing looks the worst. We have to get over it and  go to the next stage with faith and hope.

2. Po jako takim wyschni臋ciu pierwszej warstwy, pora na nast臋pn膮. Teraz, przy u偶yciu mniejszego p臋dzla, nale偶y "zblokowa膰" kolory, zacz膮膰 symulowa膰 przestrze艅 i dalej definiowa膰 faktury materia艂贸w(ro艣linno艣膰, ziemia, woda itp.). Zazwyczaj w tej fazie  rysunek wygl膮da najgorzej. Trzeba to przebole膰 i przej艣膰 do nast臋pnego etapu z wiar膮 i nadziej膮.

3. No we should grab a very thin brush and start to paint details. By the way we can unify colors (in this case I warmed colors of shadows, sky and hills in the background)and emphasize an impression of a distance (especially by adding contrasts to the nearest area).

3. Chwytamy cieniutki p臋dzel i przechodzimy do szczeg贸艂贸w. Przy okazji mo偶na ujednolici膰 kolory (w tym wypadku ociepli艂am kolor cieni, nieba oraz pag贸rk贸w w tle) oraz podkre艣li膰 przestrze艅 (szczeg贸lnie przez skontrastowanie najbli偶szego obszaru).

I'm affraid that there won't be any brilliant punchline... just a closer look on some details:

Chmmm, obawiam si臋, 偶e nie b臋dzie 偶adnej b艂yskotliwej puenty... tylko rzut oka na detale:

Saturday, 29 June 2013

Grunge Textures


"The future is just a f*** concept that we use to avoid being alive today. So, be here now."

Six Feet Under


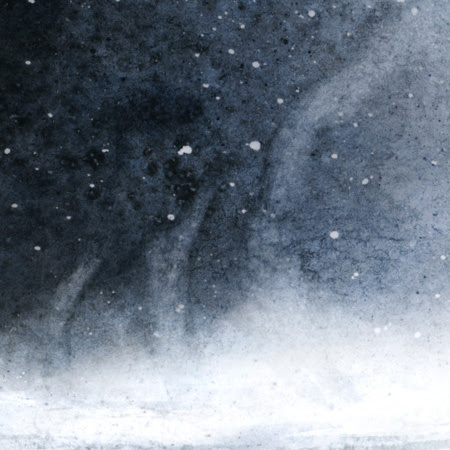
Today I'm going to show you my experimental method for creating "grunge" texture of a night sky. I tried it out when I was making a   project of a music album cover.

Dzisiaj przedstawi臋 m贸j eksperymentalny spos贸b na otrzymanie  "grunge'owej" tekstury nocnego nieba (wypr贸bowa艂am go przy okazji projektu ok艂adki albumu muzycznego).


1. Little white spots - it's just a white paper. They are created by splashing masking fluid with a toothbrush. We've got to take care of them at the beginning of work. When the illustration is finished and dry, we can peel off masking fluid and see little fragments of a white paper.

1. Jasne plamki - to nic innego jak czysta kartka. Powstaj膮 one przez rozpryskiwanie fluidu maskuj膮cego za pomoc膮 szczoteczki do z臋b贸w. Trzeba o nie zadba膰 na samym pocz膮tku malowania. Kiedy ilustracja jest sko艅czona i sucha, mo偶na 艣ci膮gn膮膰 zaschni臋ty fluid maskuj膮cy, pod kt贸rym zachowa艂 si臋 bia艂y papier.


2. Colorful stains (well, they could be colorful if I had used more diversified colors)- we put very diluted paint on a solidly wet paper (I used here blue, green, violet and a bit of black paint). We can delicately set the paper at different angles so the stains can merge here and there into a coherent whole.

2. Wielobarwne plamy (tzn. mog艂yby by膰 w pe艂ni wielobarwne, gdybym zastosowa艂a bardziej zr贸偶nicowane kolory) - na solidnie zmoczon膮 kartk臋 nak艂adamy bardzo rozwodnion膮 akwarel臋 w r贸偶nych kolorach (tu niebieski, oliwkowy, fiolet, odrobina czerni). Mo偶na delikatnie porusza膰 kartk膮, 偶eby plamy po艂膮czy艂y si臋 gdzieniegdzie tworz膮c wra偶enie sp贸jnej ca艂o艣ci. 


3. "Cloud-like" textures -when the watercolor paint is still wet, we push a crumpled tissue to it (right, I used a cheaper substitute - good, old toilette paper).

3. "Chmuropodobne" tekstury - Kiedy akwarela jest jeszcze mokra, przyciskamy do niej pogniecion膮 chusteczk臋 higieniczn膮 (racja, ja u偶ywam ta艅szego substytutu - starego, dobrego papieru toaletowego).


4. Fog/ steam - a tactic is similar to the one from the previous point, but this time we wipe the paint harder using  a tissue with a "self-made tip".  

4. Mg艂a/para - taktyka podobna do tej z  poprzedniego punktu, ale tym razem wycieramy farb臋 mocniej, za pomoc膮 chusteczki z "w艂asnor臋cznie ukszta艂towan膮 ko艅c贸wk膮".


5.  Irregular texture - well know and loved salt. We drop several grains of salt on the paper with wet watercolor paint. The more wet paint and the bigger grains, the clearer results can be achieved.

5. Nieregularna tekstura - znana i lubiana s贸l , kt贸r膮 posypujemy kartk臋 z mokr膮 akwarel膮 (wystarczy kilka ziarenek). Im wi臋ksze ziarna i bardziej mokra akwarela, tym wyra藕niejszy efekt.


We've got to accomplish steps 2-5 pretty fast, when the watercolor is still wet. And when it gets dry, we can proceed the next step:
6. Little dark spots - we splash dark paint with a toothbrush. In the end we can peel off masking fluid to reveal little white spots.

Z wykonaniem punkt贸w 2-5 trzeba si臋 uwin膮膰, kiedy akwarela jest wci膮偶 wilgotna. Natomiast kiedy wyschnie, mo偶na przyst膮pi膰 do nast臋pnego kroku:  
6. Ciemne plamki - za pomoc膮 szczoteczki do z臋b贸w rozpryskujemy ciemn膮 farb臋. Na koniec zdejmujemy fluid maskuj膮cy ods艂aniaj膮c jasne plamki.


Dear watercolor painters - contrive, devise your own methods for new, interesting textures and HAVE FUN!

Drodzy akwareli艣ci - kombinujcie, obmy艣lajcie w艂asne sposoby na nowe, ciekawe tekstury i BAWCIE SI臉 DOBRZE!

Saturday, 11 May 2013

Surreal Waterscape vol.2


(...)Can you tell a green field
From a cold steel rail?
A smile from a veil?
Do you think you can tell?"

Pink Floyd "Wish You Were Here"


The drawing on the left is absolutely unrelated to the post's content but May 13th is inexorably approaching  (yes, I know, the amount of candles is just appalling).As I've promised here's a complement of a previous post - several  steps between step 6th and 7th. I admit that the presentation is a little cursory because of a chronic lack of time.

Rysunek obok jest absolutnie bez zwi膮zku z tre艣ci膮 wpisu, ale 13 maja zbli偶a si臋 nieub艂aganie (wiem, liczba 艣wieczek na torcie wygl膮da zatrwa偶aj膮co). A teraz obiecane uzupe艂nienie poprzedniego wpisu, czyli kilka krok贸w mi臋dzy pkt. 6 a pkt. 7. Przyznaj臋, prezentacja b臋dzie nieco pobie偶na, poniewa偶 cierpi臋 na chroniczny brak czasu.


6A. Choice of colors. I used mix of orange, sepia and violet here. Paint was very diluted at the beginning.  Right after painting with that mixture I added some salt to make an varied stone texture.

6A. Dob贸r kolor贸w. Zastosowa艂am mieszank臋 pomara艅czowego, sepii oraz fioletu. Na tym etapie farba jest bardzo rozwodniona. Tu偶 po na艂o偶eniu akwareli na kartk臋 doda艂am nieco soli dla urozmaicenia faktury kamienia.

6B. A lot was happening here. I put some watercolors on lighted parts of the portal and darkened shadowed parts.  I put more attention to bring out three-dimensional elements  without delving into the details. The sky and the water on the foreground were darkened. Also it's hard to overlook replacing the dead forest with a starry sky. I adjudged that  trees would distract the viewer (at least they distracted me :) ).

6B. Sporo sie dzia艂o. Na艂o偶y艂am akwarel臋 na o艣wietlone cz臋艣ci portalu, a te zacienione zacieni艂am jeszcze bardziej, przyk艂adaj膮c wi臋ksz膮 ni偶 w poprzednim podpunkcie uwag臋 do wydobycia tr贸jwymiarowo艣ci poszczeg贸lnych element贸w. Nie zag艂臋bia艂am si臋 jednak jeszcze w ornamenty. Przyciemni艂am r贸wnie偶 niebo i wod臋 na pierwszym planie. Trudno te偶 przeoczy膰 zast膮pienie bia艂ego lasu rozgwie偶d偶onym niebem, w celu skupienia uwagi obserwatora na bardziej istotnych elementach. 

6C. Details with not too diluted watercolors.

6C. Detale niezbyt rozwodnion膮 akwarel膮.

6D. Details with a pen.

6D. Detale cienkopisem.

9B. In steps 8th and 9th from the previous post I added portal's reflections. Here I merged elements in an inner part of the portal's arch by deepening the shadow. 

9B. Poza dodaniem odbicia (kt贸re zosta艂o om贸wione w punktach 8 i 9 poprzedniego wpisu), "scali艂am" nieco bry艂臋 w wewn臋trznej cz臋艣ci 艂uku poprzez pog艂臋bienie cienia w艂asnego (och, nienawidz臋 pos艂ugiwa膰 si臋 pseudo-fachowym j臋zykiem, ale chwilowo nic lepszego nie przychodzi mi do g艂owy). 

Next weekend I'll write a nice and easy post about illustrations for a children book! 

W przysz艂y weekend wpis lekki, 艂atwy i przyjemny na temat ilustrowania ksi膮偶ki dla dzieci!

Friday, 10 May 2013

Surreal Waterscape


"So, so you think you can tell
Heaven from Hell,
Blue skies from pain." (...)
Pink Floyd "Wish You Were Here"


0. A so called "personal work" - a surreal/fantasy landscape. As it usually happens with personal works, the idea developed for quite a long time till appropriate circumstances appeared (which means "I had free time for that".) I started to paint first version several months ago. However due to other duties I stopped works on my own illustration and when I came back to it...

0. Tzw. "praca personalna"- fantastyczno-surrealistyczny krajobraz. Jak to zwykle z pracami personalnymi bywa , pomys艂 kie艂kowa艂 w mojej g艂owie przez d艂u偶szy czas, ewoluowa艂, a偶 w ko艅cu pojawi艂y si臋 odpowiednie okoliczno艣ci, 偶eby go zrealizowa膰 (czyt. "mia艂am na to czas"). Pierwsz膮 wersj臋 zacz臋艂am malowa膰 kilka miesi臋cy temu. Jednak z powodu kolejnych obowi膮zk贸w przerwa艂am prac臋 nad w艂asnym projektem, a kiedy zn贸w do niego zasiad艂am...


1. ... I decided to change some significant elements so I had to start the drawing once more. As you can see I replaced sharp rocks with oblong stones protruding from the water. And that's the main theme of this post- water.  Obviously water itself is transparent so painting water means in fact painting reflections and  elements below water's surface with some additional distortions.

1. ... zdecydowa艂am si臋 zmieni膰 pewne istotne elementy, wi臋c musia艂am rozpocz膮膰 rysowanie od pocz膮tku. Jak wida膰 zast膮pi艂am ostre ska艂y tafl膮 wody z ob艂ymi kamieniami. Oto i temat przewodni dzisiejszego wpisu - woda. Oczywi艣cie woda sama w sobie jest przezroczysta. Przedstawianie jej oznacza wi臋c w uproszczeniu malowanie element贸w znajduj膮cych si臋 pod wod膮 oraz odbi膰 element贸w znajduj膮cych si臋 nad ni膮 z dodaniem mniejszych lub wi臋kszych zniekszta艂ce艅.

2. I started with the sky because as the biggest element reflecting in the water  it would determine water's color. It was made with "wet on wet" technique. Then I made parts of stones protruding above the water. Stones under the water were indicated by painting water around them with a very diluted watercolor. I used here "wet on dry" technique.

2. Zacz臋艂am od nieba, poniewa偶, jako najwi臋kszy element odbijaj膮cy si臋 w wodzie, b臋dzie ono mia艂o najbardziej istotny wp艂yw na jej kolor. U偶y艂am do tego techniki "mokre na mokrym". Nast臋pnie technik膮 "mokre na suchym" namalowa艂am cz臋艣ci kamieni wystaj膮ce ponad powierzchni臋 wody. Zasygnalizowa艂am te偶 kamienie znajduj膮ce si臋 pod wod膮 poprzez obmalowanie ich rozwodnion膮 niebiesk膮 akwarel膮. 

3. With "wet on wet" technique I painted the part of the water nearest the viewer and darkened the stones below the water's surface. I added some violet paint to indigo (I've got an impression that violet adds depth). I decided that water should be brighter as the distance growths to achieve effect of aerial perspective. Naturally it makes sense  if the water has the same depth everywhere . 

3. Technik膮 "mokre na mokrym" namalowa艂am cz臋艣膰 wody najbli偶ej obserwatora oraz przyciemni艂am kamienie pod jej powierzchni膮. Do granatowego domiesza艂am nieco fioletu (mam dziwne wra偶enie, 偶e fiolet dodaje g艂臋bi). Postanowi艂am rozja艣nia膰 wod臋 w miar臋 oddalania si臋 od obserwatora, 偶eby uzyska膰 efekt perspektywy powietrznej. Oczywi艣cie ma to sens, kiedy woda ma wsz臋dzie ta sam膮 g艂臋boko艣膰. 

4. I darkened the part of stones which are nearest the surface of the water and I added their reflections.

4. Przyciemni艂am t膮 cz臋艣膰 kamieni, kt贸ra styka si臋 bezpo艣rednio z wod膮.  Nast臋pnie doda艂am ich odbicia.

5. Butterflies were painted with the most vibrant colors I could find in my palette. I don't use them very often but I wanted these butterflies to attract maximum attention.

5. Motyle zosta艂y namalowane najbardziej 偶ywymi kolorami, jakie mog艂am znale藕膰 w swojej palecie. Nie u偶ywam tych farb zbyt cz臋sto, ale zale偶a艂o mi na tym, 偶eby motyle przyci膮ga艂y jak najwi臋cej uwagi.

6. Detailing butterflies with a very thin brush - "dry on dry" technique. A waterproof pen also helped me here.

6. Praca nad detalami bardzo cienkim p臋dzlem technik膮 "suche na suchym". Z pomoc膮 przyszed艂 mi r贸wnie偶 cienkopis.

7. By chance I came across a paper cutter so I decided to make some highlights on the water with it. I also darkened the water in the foreground to emphasize an impression of distance between an observer and the portal which... yes, I know it's already finished but in the next post I'll show how it was painted step by step.

7. Przypadkiem natkn臋艂am si臋 na no偶yk do papieru, wi臋c zdecydowa艂am si臋 doda膰 wodzie nieco "b艂ysk贸w" poprzez delikatne wydrapywanie kartki.  Przyciemni艂am r贸wnie偶 wod臋 na pierwszym planie, 偶eby podkre艣li膰 przestrze艅 dziel膮c膮 obserwatora od portalu, kt贸ry... tak, wiem, 偶e jest ju偶 sko艅czony, ale w nast臋pnym wpisie poka偶臋, jak powstawa艂 krok po kroku.

8. Main blocks painted in "wet on dry" technique with some salt.

8. Zasadnicze bry艂y malowane technik膮 "mokre na suchym" z dodatkiem soli. 

9. Details and distortions. It's a good idea to make some characteristic elements which can be reflected in an interesting way (some cracks in a stone for example). Cracks on the portal were emphasized with a pen while cracks from reflections were made with watercolors only. It made them look transparent and less accurate.

9. Detale i zniekszta艂cenia. Dobrze jest doda膰 charakterystyczne elementy, kt贸re w ciekawy spos贸b b臋d膮 mog艂y odbija膰 si臋 w wodzie, jak na przyk艂ad sp臋kania w kamieniu. Rysy na portalu zosta艂y wzmocnione cienkopisem, natomiast te na odbiciach zosta艂y wykonane jedynie akwarel膮. Dzi臋ki temu s膮 transparentne i mniej precyzyjne.


As I've already written, I'll present process of painting the portal. I'll show the whole illustration then so I encourage to read it (or just looking at it) :)

Jak ju偶 pisa艂am, w nast臋pnym wpisie przedstawi臋 etapy malowania portalu. Poka偶臋 wtedy ca艂o艣膰 ilustracji, wi臋c zapraszam do czytania (lub przynajmniej ogl膮dania) :)

Saturday, 2 February 2013

TRAIN


"The greatest ideas are the simplest.” 

"Lord of the Flies"

William Golding 


Finally, after quite a long waiting I can publish an illustration made for a poetry magazine.


Wreszcie, po do艣膰 d艂ugim czasie mog臋 opublikowa膰 ilustracj臋 wykonan膮 dla magazynu o poezji.


Probably that's one of my ugliest sketches since I've discovered I should draw with my left hand (and it WAS drawn with a left hand). My only explanation is the fact I've made it for my own purposes and there was no necessity to show it to the customer.

To chyba jeden z moich najbrzydszych szkic贸w od czasu, kiedy odkry艂am, 偶e powinnam rysowa膰 lew膮 r臋k膮 (a BY艁 rysowany lew膮). T艂umaczy mnie tylko to, 偶e zrobi艂am go wy艂膮cznie na w艂asny u偶ytek i nie by艂o konieczno艣ci pokazywania szkic贸w koncepcyjnych zleceniodawcy.


First layer of color - a bit too greenish, but it can be fixed later.

Pierwsza warstwa koloru - nieco zbyt zielona, ale da si臋 to naprawi膰 p贸藕niej.

A bit of indigo and violet for adding contrasts and improving general color. Och, there's also a train!

Nieco indygo i fioletu dla zwi臋kszenia kontrast贸w i poprawienia og贸lnej kolorystyki. Och, jest te偶 poci膮g!

A clock in the background and laborious detailing with a pen and a razor blade.

Zegar w tle i m臋czenie detali pi贸rkiem i 偶yletk膮.

For insightful people - enlargements of textures. Starring:
SALT: this characteristic "hoarfrost" is actually salt's work. I only put it on the wet paint and the salt did all the work. 

Dla wnikliwych - powi臋kszenia tekstur. W rolach g艂贸wnych:
S脫L: charakterystyczny "szron" to w艂a艣nie jej dzie艂o. Ja tylko troszk臋 sypn臋艂am na mokr膮 farb臋, a ona odwali艂a ca艂膮 prac臋 :)


MASKING FLUID: these white specks on the clock was created by masking the paper with masking fluid before I painted over it with watercolors. To splash it I recommend a toothbrush... seriously. (You can find more infos about masking fluid in one of my previous posts http://grimdreamart.blogspot.com/2012/04/masking-fluid.html ) .

FLUID MASKUJ膭CY: bia艂e drobinki na zegarze powsta艂y dzi臋ki zamaskowaniu czystej kartki fluidem przed na艂o偶eniem farby. Do rozpryskiwania go polecam szczoteczk臋 do z臋b贸w... serio. (Wi臋cej o fluidzie maskuj膮cym w jednym z poprzednich wpis贸w http://grimdreamart.blogspot.com/2012/04/masking-fluid.html ).


RAZOR BLADE: it helped me to create highlights on railroad tracks (and unintended cuts on my fingers). It did its job well but paper knife would be more safe...

呕YLETKA: pomog艂a stworzy膰 b艂yski na torach (i niezamierzone naci臋cia sk贸ry na moich palcach). Dobrze si臋 spisa艂a, ale no偶yk do papieru by艂by bezpieczniejszy...


Thursday, 5 April 2012

Masking Fluid

"(...) that is the secret of happiness and virtue-liking what you've got to do."
"Brave New World"
Aldous Huxley

"(...) to jest ca艂a tajemnica szcz臋艣cia i cnoty. Lubi膰 to, co si臋 musi robi膰."
"Nowy Wspania艂y 艢wiat"
Aldous Huxley


I haven't  mentioned about masking fluid on this blog I suppose. It's actually almost necessary tool for every watercolour artist (do not mistake with matting fluid almost necessary for every pimpled teenage girl). There he is:

Zdaje si臋, 偶e nie wspomina艂am jeszcze na blogu o fluidzie maskuj膮cym. Tymczasem jest on niemal niezb臋dny dla ka偶dego akwarelisty (nie myli膰 z fluidem matuj膮cym, niemal niezb臋dnym dla ka偶dej pryszczatej nastolatki). Oto i on:


 1. For uninitiated - it looks awfully, smells even worse, it's consistency is truly repulsive and I really don't  want to know how does it taste. Still it preserves selected areas of painting from accidental pouring paint over them (especially when we use "wet on wet" technique). After placing masking fluid with a brush we'll have to wait until the fluid dries up.

 1. Dla niewtajemniczonych -wygl膮da okropnie, pachnie jeszcze gorzej, ma doprawdy paskudn膮 konsystencj臋 i nawet nie chc臋 wiedzie膰 jak smakuje. Niemniej zabezpiecza wybrane przez nas obszary rysunku przed przypadkowym zalaniem farb膮 (szczeg贸lnie gdy stosujemy technik臋 "mokre na mokrym", np. podczas malowania nieba). Po na艂o偶eniu go p臋dzelkiem trzeba poczeka膰 a偶 wyschnie.
2. Now we can paint with confidence.
2. Teraz mo偶na malowa膰 bez obaw.
3. When paint dries up, masking fluid can be simply removed (just like a sticking tape, but it doesn't tear up a paper).
3. Po wyschni臋ciu farby, po prostu go zdejmujemy (jak ta艣m臋 klej膮c膮, z t膮 r贸偶nic膮, 偶e nie drzemy przy okazji kartki).
4. Generally this would be enough about masking fluid. It's time to go to the main topic.
4. W zasadzie to by by艂o tyle w temacie fluidu maskuj膮cego. Pora przej艣膰 do g艂贸wnego tematu.
5. The environment...
5.Teraz  otoczenie...
6. Finally, the emphasis of the most important elements with a pen (the sketch was made with a barely alive felt pen, so it disappeared under the watercolour paint).
6. Wreszcie pokre艣lenie najbardziej istotnych element贸w pi贸rkiem (szkic by艂 wykonany ledwo 偶ywym pisakiem, wi臋c znikn膮艂 pod akwarel膮).
Maybe it's not the most spectacular example of using masking fluid but this should be enough to show the general rule of using it :)
By膰 mo偶e nie jest to najbardziej spektakularny przyk艂ad u偶ycia fluidu maskuj膮cego, ale powinien wystarczy膰 do pokazania og贸lnej zasady u偶ycia :)